IMPORTANT: Sologenic is currently running on SIMULATOR mode and therefore all transactions must take place on the TESTNET XRP Ledger.
Sologenic Ecosystem uses the XRP Ledger Blockchain to conduct tokenizations and thus allowing the tokenized assets to be traded/exchanged on the XRP Ledger Built-in Decentralized Exchange. There are two types of Trustlines in the XRP Ledger, a regular one-way Trustline, and an Authorized two-way Trustline. Sologenic, requires an Authorized Trustline to allow assets to be withdrawn from the platform.
To withdraw your tokenized assets from Sologenic, you need to setup a Trustline from your personal wallet to Sologenic (Issuer) and request Sologenic gateway to Authorize this Trustline once it is established.
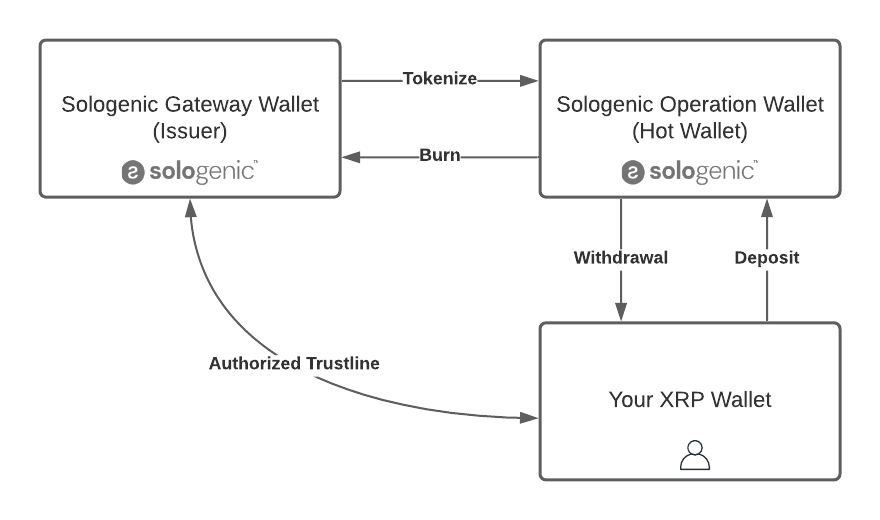
Sologenic Trustline structure
Follow the instructions below to set up a Trustline to Sologenic for an asset.
Please note that the following instructions are to be used by advanced users who know details about the inner workings of the XRP Ledger transactions and Trustlines.Use at your own risk. Sologenic is not responsible for any loss of your assets or misconfigurations.
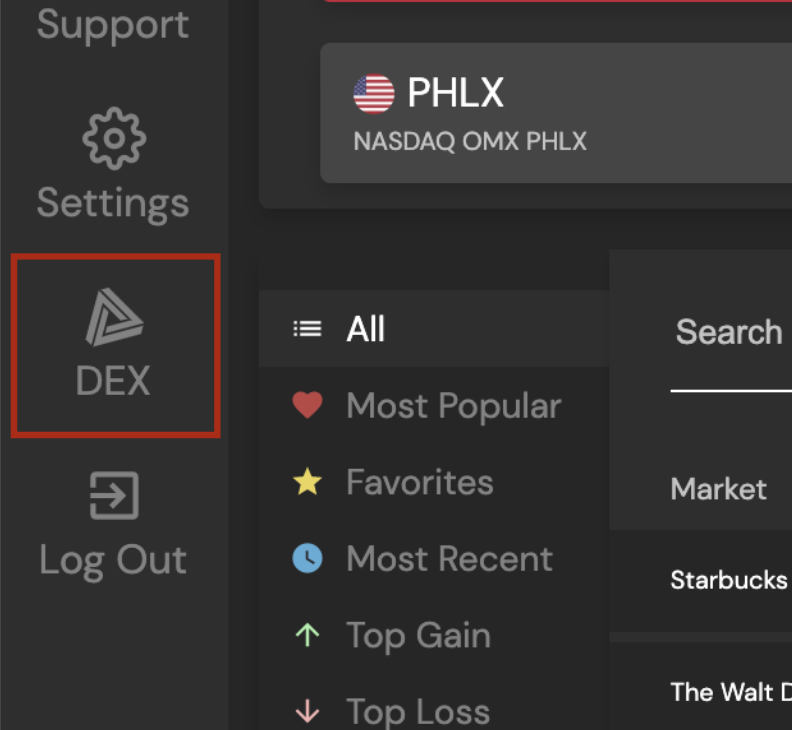
First, navigate to the "DEX" Section on the website or the app.
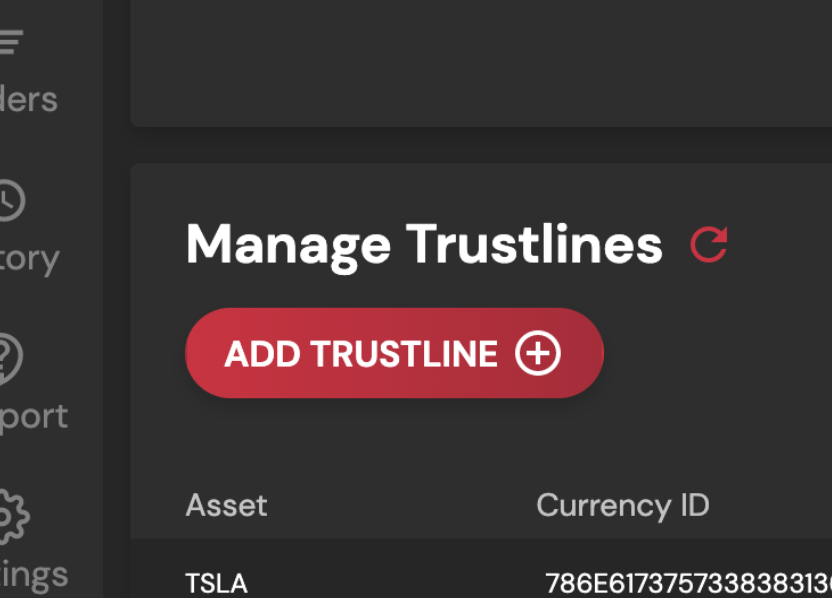
Next, click "Add Trustline".
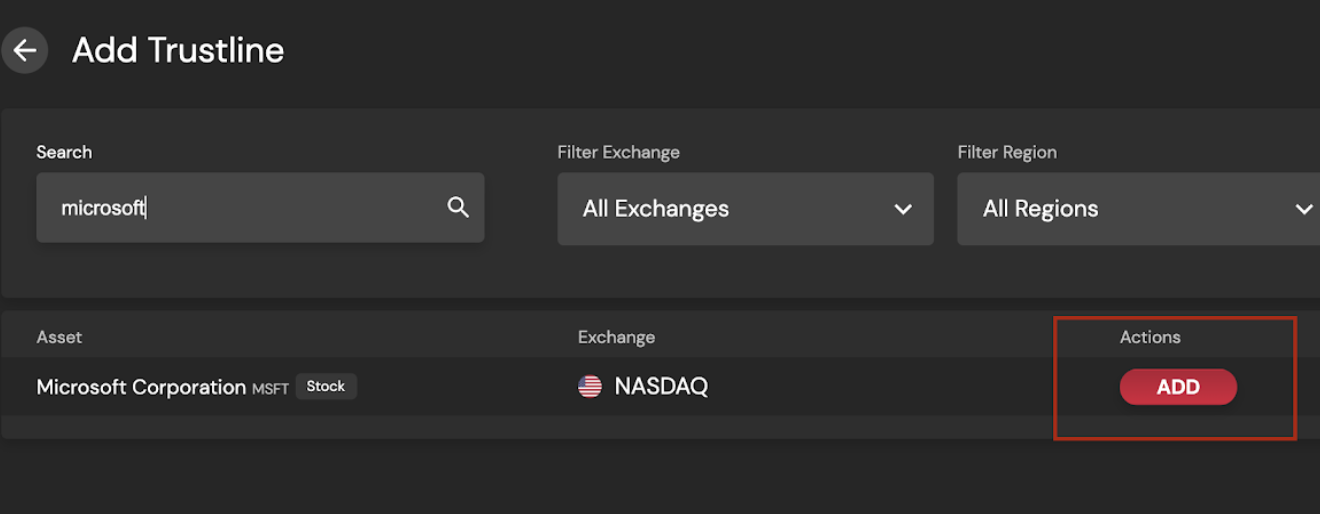
Next, search for the asset you wish to establish the Trustline for.
And finally, note the "ISSUER", "CURRENCY" and "LIMIT" values, and leave this page open for the time being.
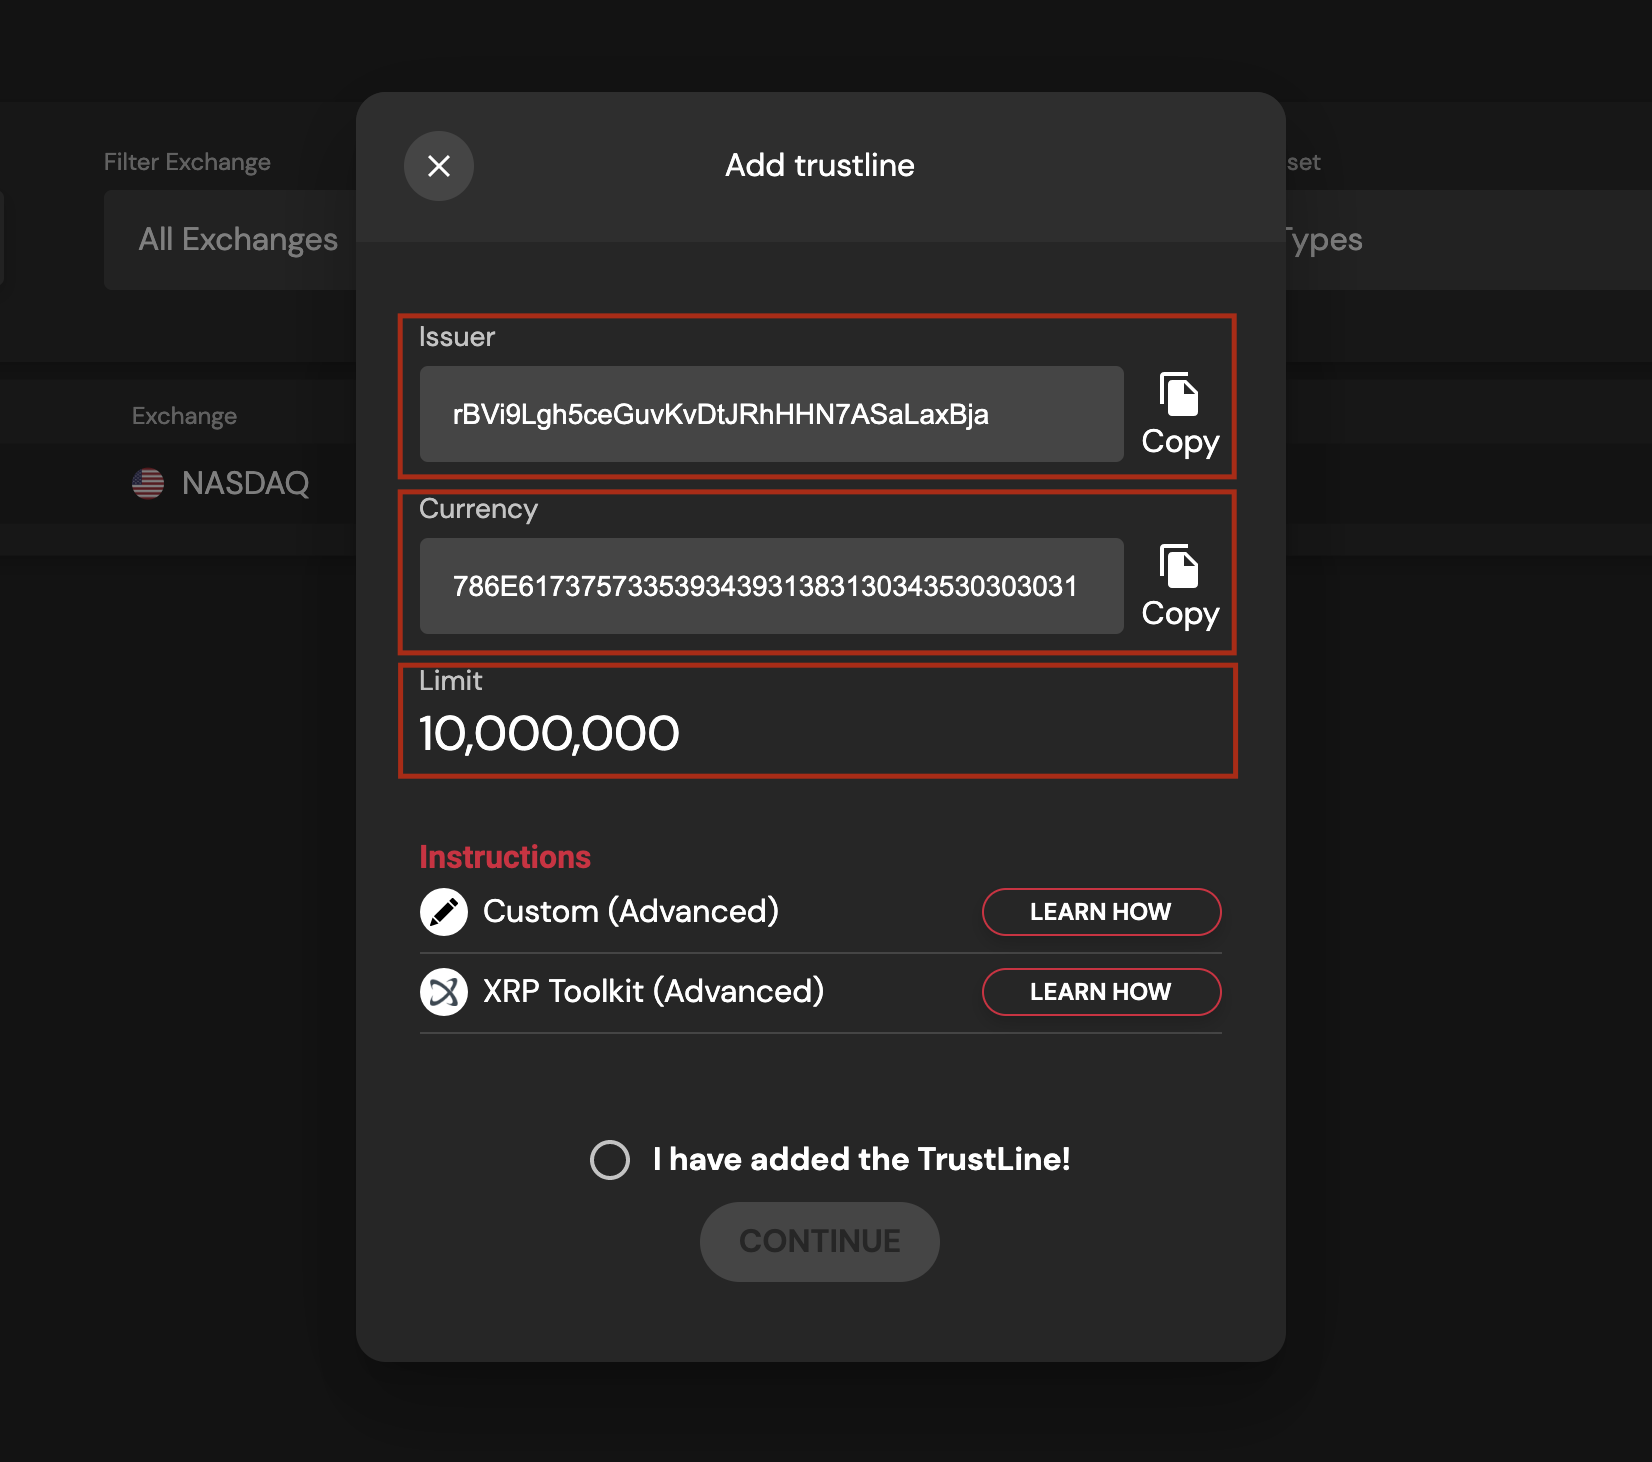
Using your favorite wallet, create and sign a transaction on the XRP Ledger as follows (Replace with your values) To see how to submit transactions to the XRP Ledger, you can use the Sologenic JS SDK https://github.com/sologenic/sologenic-xrpl-stream-js or follow guides provided by the https://xrpl.org Please note that adding a Trustline increases your reserve requirements by 5 XRP. To learn more visit: https://xrpl.org/reserves.html
            {
              "TransactionType": "TrustSet",
              "Account": "{YOUR WALLET ADDRESS}",
              "LimitAmount": {
                "currency": "{CURRENCY CODE}",
                "issuer": "{ISSUER}",
                "value": "{LIMIT}"
              },
              "Flags": 2147614720 //Be sure to includee this flag which set the NoRipple flag on this trustline.
            }
For example if you are using sologenic-xrpl-stream, your code will look like:
$ mkdir sologenic-trustline && cd sologenic-trustline
$ npm init
$ npm install sologenic-xrpl-stream-js
Create a file with the following code, for example: trustline.js
            'use strict';
            const ƨ = require('sologenic-xrpl-stream-js');

            (async () => {
              try {
                const sologenic = await new ƨ.SologenicTxHandler(
                  {
                    server: 'wss://s.altnet.rippletest.net',
                  },
                  {
                    clearCache: true,
                    queueType: "hash",
                    hash: {}
                  }
                ).connect();

                await sologenic.setAccount({
                  address: '{YOUR WALLET ADDRESS}',
                  secret: '{YOUR WALLET SECRET}'
                });

                const tx = sologenic.submit({
                  TransactionType: 'TrustSet',
                  Account: 'rNbe8nh1K6nDC5XNsdAzHMtgYDXHZB486G',
                  LimitAmount: {
                    currency: '{CURRENCY}',
                    issuer: '{ISSUER}',
                    value: '{LIMIT}'
                  },
                  Flags: 2147614720
                });

                }).on('validated' => {
                  console.log('Success');
                });.on('failed' => {
                  console.log('Failed');
                });
                console.log(await tx.promise);
              } catch (error) {
                console.log('Error:', error);
              }
            })();
And execute the code
$ node trustline
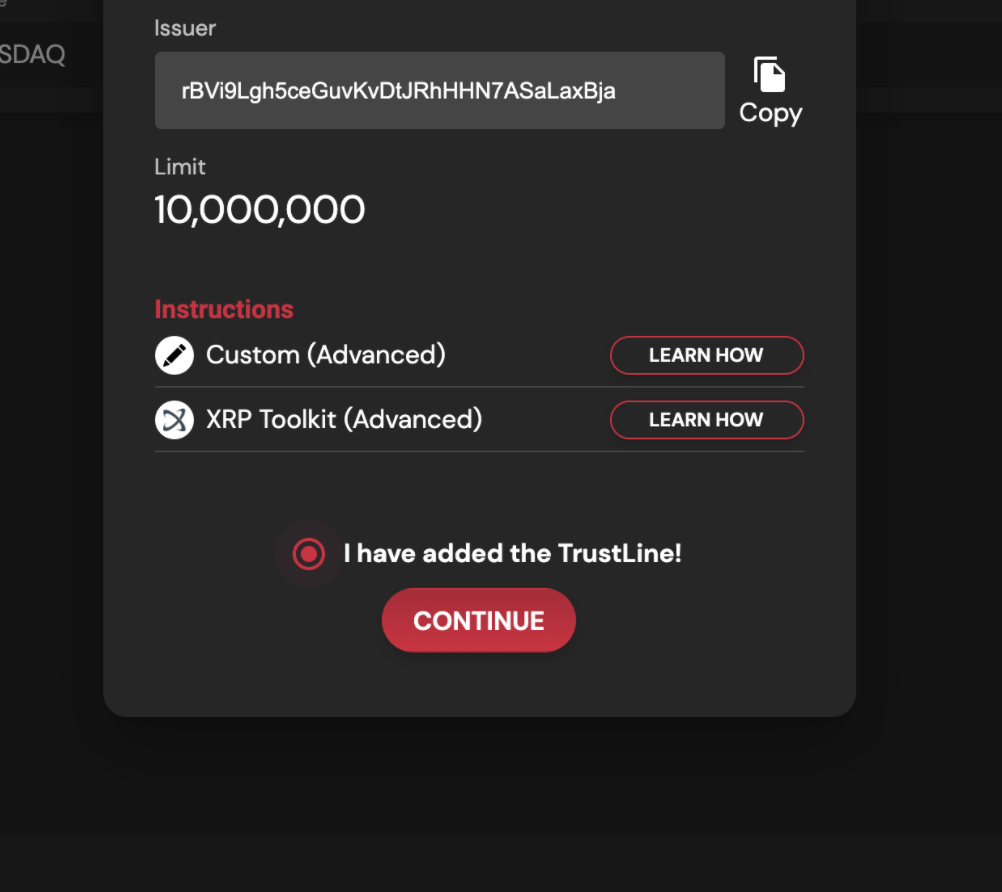
Now that you have established the Trustline from your wallet, you
need to authorize it by going back to the Sologenic Platform.
Click "Continue".
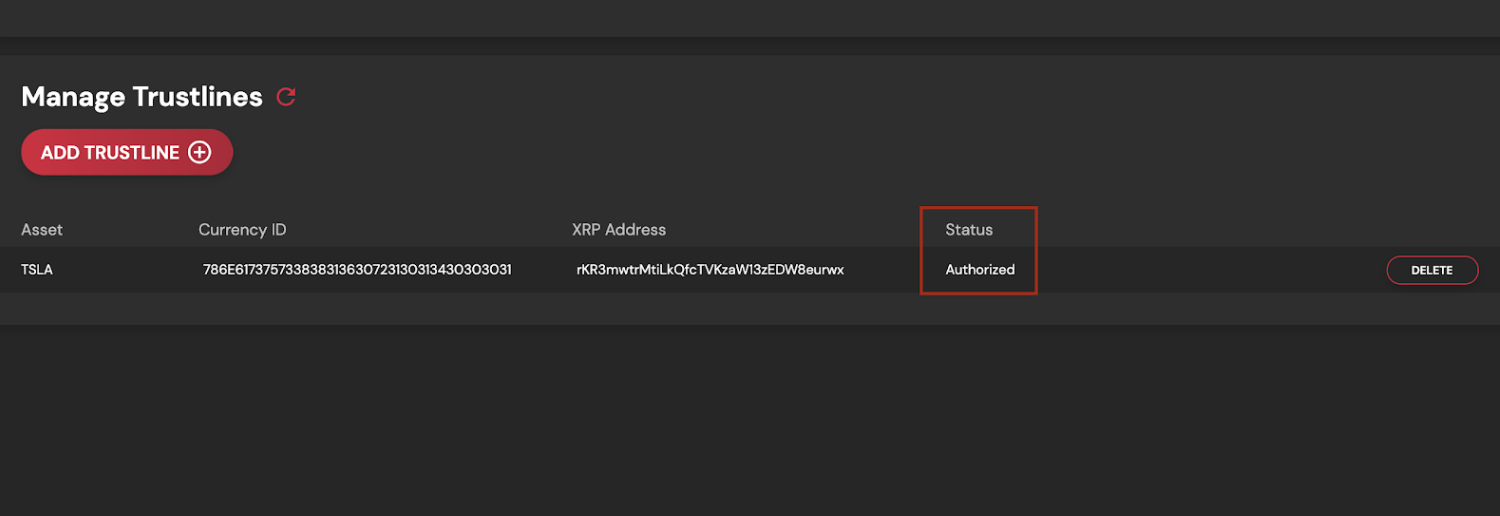
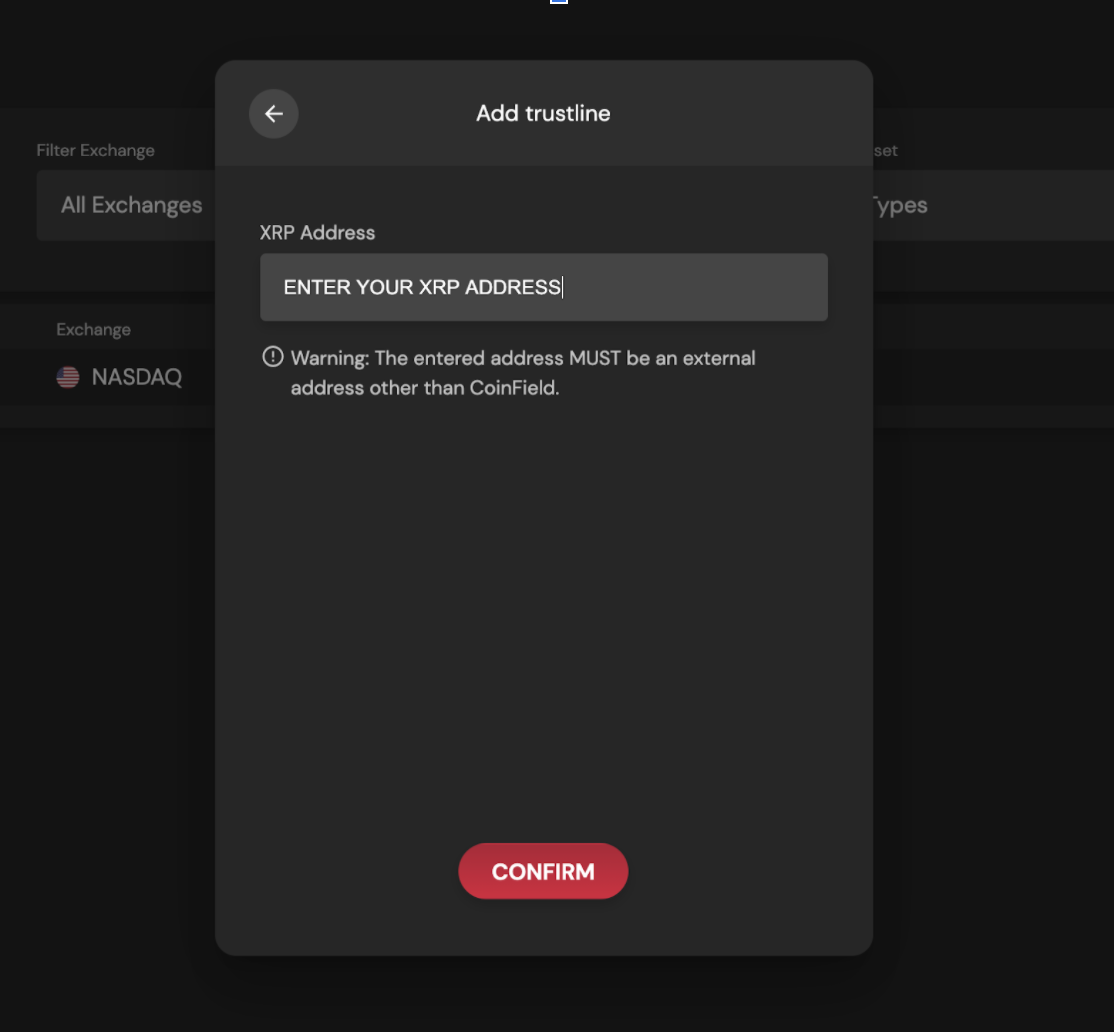
Next, enter your XRP wallet address. (The one you just established a Trustline from) and then click "Confirm".
It may take a few seconds for your Trustline to become authorized. If your Trustline is not "authorized" please make sure you set up the Trustline from your wallet correctly and then click the "Auth" button to try authorizing again.